
Easy DIY Faux Butcher Block Countertop for Laundry Room

Is your laundry room a little bit of a dumping ground? Mine was, until I discovered the high end look of a faux butcher block countertop. This was actually my very first woodworking project and I learned the hard way that wood countertops can be tricky if you don’t know what you’re doing. Don’t worry because I will show exactly how to make faux butcher block counters as a laundry surround so you don’t do the extra hard work that I ended up doing! This is a beginner friendly idea that you don’t need a great budget for and I’ll even share my secret formula for stain!
Background to my Laundry Room Makeover

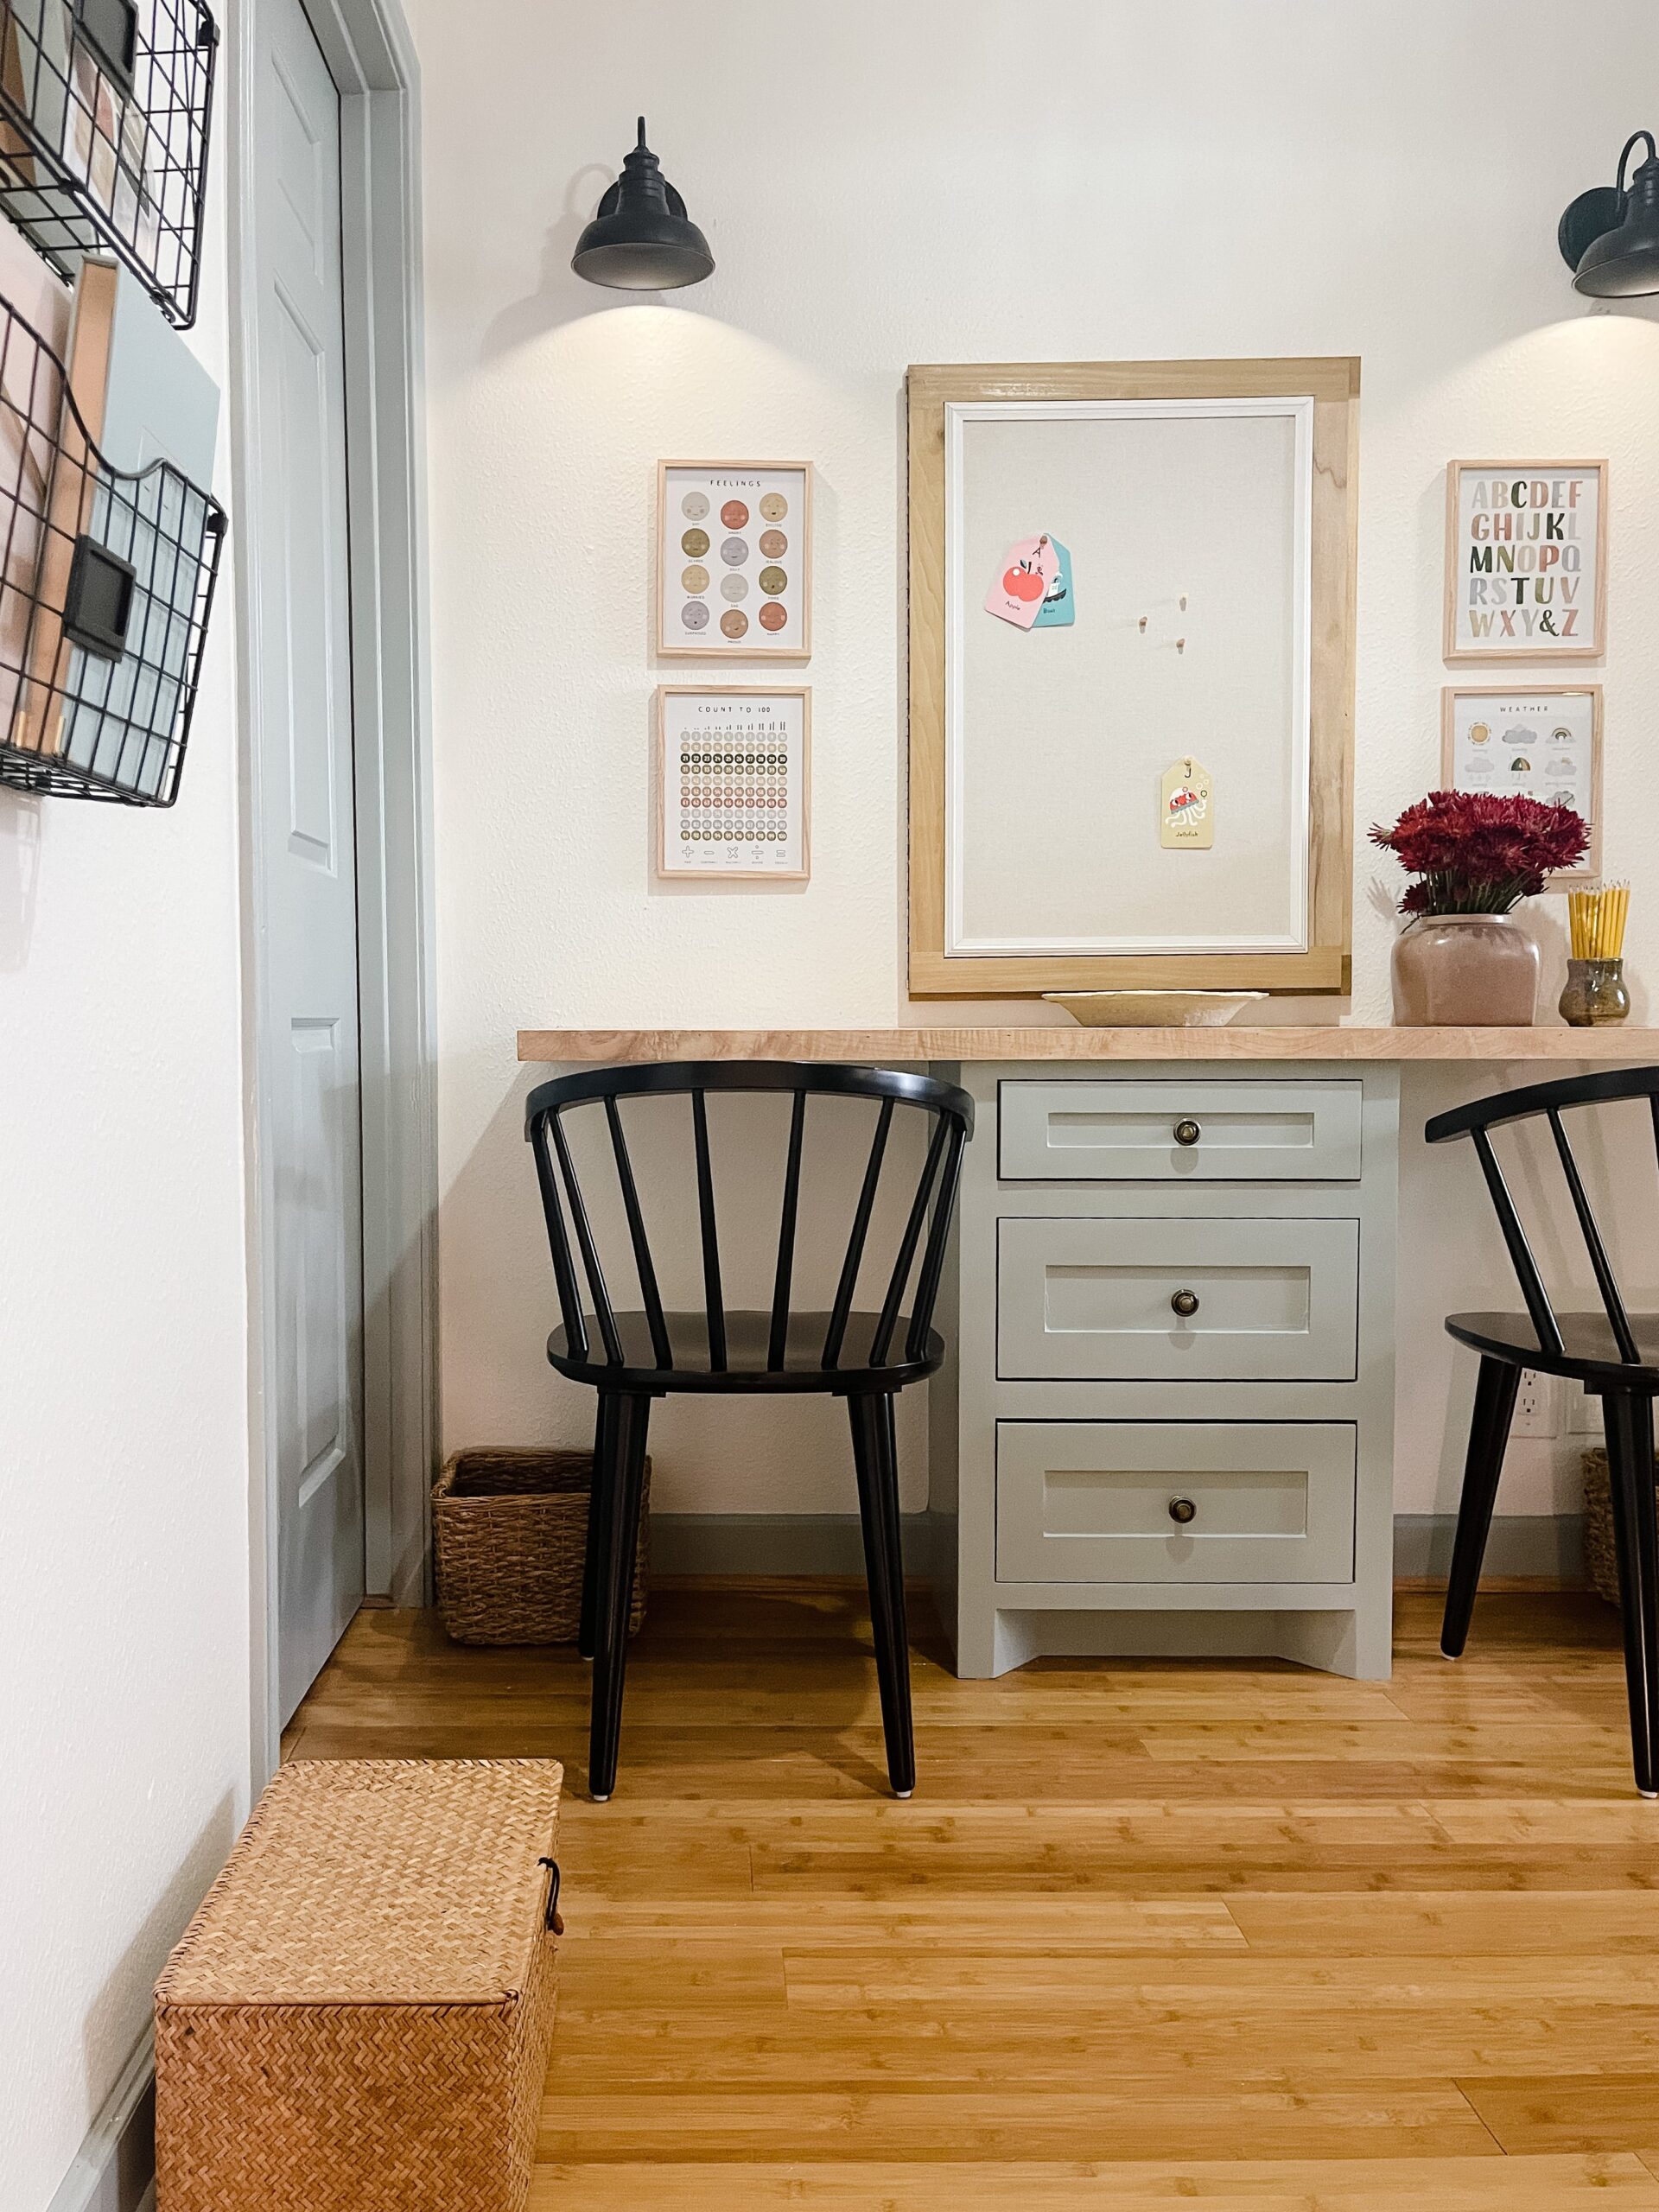
My laundry room was the first space I tackled in my current home, with little to no DIY knowledge. The reason I chose the laundry room as my first project was because it was the perfect spot to hide if it didn’t turn out good! I could just close the door and no one would see it. There are tons of ideas on how to upgrade your utility or laundry room but I wanted a beginner friendly idea that would instantly give me a high design look without spending large amounts of money.
I love the butcher block look but real butcher block can be pricey and I was working on a tight budget.
This tutorial is part two of my laundry makeover which is all about this gorgeous DIY faux butcher block countertop! If you haven’t caught up with part one, you can read about my DIY painted floor tile project here:

I painted the basic builder grade tile using a tile stencil and it was such an easy way to add a big impact to my space.
Before I jump into the countertop, I wanted to share the easiest way to “tile” a backsplash: peel and stick wall tiles! There’s literally no skill involved here and it’s something anyone can do. I got mine in a white subway tile pattern with a dark grout and I’ll link it down below. I would get this done before building your DIY wood countertop.

Now let’s get to where I started with the laundry room makeover, the first sketch which was a little different from what I ended up going with, but that sketch got the ball rolling.
Planning for the Faux Butcher Block Counters
I had done a lot of research before diving into this project and knew that most people had a circular saw or a table saw. I had neither! But I was determined to get my cuts made at The Home Depot and finish the rest in my humble garage workshop. I wanted a waterfall edge for the new counters and for it to wrap around the washer and dryer in a seamless look.

I was heavily inspired by this one image from Vintage Revivals from when she made her waterfall edge countertop and that tutorial really saved my day. I had never done any woodworking project prior to this and knowing that there were others out there who had attempted similar things was very comforting. Little did I know I had picked a tricky project for my first time! If you are just starting out with woodworking, please pick a more basic project like making an art ledge! Most importantly, owning a circular saw or table saw will save you extra work time and extra wood. I ended up buying another piece of plywood because I messed up my measurements. Lesson learned.
I also ended up sanding down the top layer of wood (thank God pine boards sand easily) because I ruined the grain pattern with stain. More on that later! The one thing I did right was sketch my design prior to building and figure out what type of wood I wanted to go with before heading to the hardware store. What kind, you ask? The cheapest slightly thick piece of pine I could find, hah! I got 1/2″ pine in a 4×8′ sheet. In retrospect I should have gotten a 3/4″ thick wood board which would have been more sturdy. I used 2″ wide trim pieces to create the look of a thicker block of wood.

Because I didn’t have a table saw I couldn’t make a mitered edge for the two countertop pieces to meet (a 45 degree edge). I ended up using iron on wood veneer to cover up the raw cut edge and that’s your best way to create a faux waterfall edge.

I had a few requirements for my laundry surround before building the countertop:
- I wanted to be able to access the plumping in the back, so I didn’t want the whole surface to be permanently secured to the wall.
- I had to make a faux waterfall edge because I didn’t want to go out and buy a table saw or other tools to help make a long mitered cut.
- I also could not relocate the plumbing and power lines so they would have to be accommodated in the design.
I sketched out the final plans as shown above, measured the space from the right wall to the entire length of the countertop and down to the floor. In the end, I only screwed in one 2×4″ stud into the right side wall and that’s where the countertop rests. The other edge is just supported by the panel that meets the floor.
Materials and Tools Needed
All products are linked at the end of the post.
Materials Needed
- 1 4×8′ Piece of any Soft Wood (I used pine and had them cut to size at The Home Depot)
- 1 2×4″ Common Stud 8′ length
- L brackets
- 1×2″ Furring Strip (10′ length)
- Wood Glue
- 1.5″ Brad Nails
- 3″ Wood Screws
- 220 Grit Sandpaper
- Oil or Gel Stain
- Wood Filler
- Foam Brush or Rags
Tools required
- Compound Miter saw
- Brad Nail Gun
- Stud Finder
- Orbital or Palm Sander
How to Build Your Own DIY Butcher Block Countertop
Step 1: Attach Support to Wall
Cut the 2×4″ piece to size, my measurement was 24″ and use your wood screws to secure it to the wall, making sure you hit two studs in the wall.
Step 2: Position Countertop Pieces

Once the stud is securely attached to the wall, rest your countertop piece on it and place the side piece below it as shown. This will give you a rough idea if your measurements are correct or not. The countertop is starting to take shape!
Step 3: Glue and Secure Joints
Using wood glue, attach the top part of the countertop to the side piece just how it’s resting on the picture below. Screw in 2 L brackets on the inside to secure the joint. You can cover up the raw wood edge of the side piece with iron on veneer edging (linked below). This isn’t the most ideal look but for my level of skill at the time and given the limited tools I had it worked fine for me. You could make a 45 degree mitered cut using a table saw and follow the same steps. You won’t need any iron on veneer edging then.
Step 4: Add Face Frame

To make the faux butcher block countertop look thicker, we will face frame it with the 1×2″ furring strip. Measure out where your cuts need to be and make 45 degree miter cuts to get it to size. Secure the pieces on the face of the countertop using wood glue and your nail gun
Step 5: Sand and Stain
Give your countertop a good sanding and wipe down before staining. And here’s my secret stain formula for this beautiful aged look.The first thing that went on was wood conditioner, apply it generously. Next, I did one very light coat of Weathered Oak Stain by Minwax and then sanded it down until the stain was significantly lightened to get the look I wanted. Then I repeated that process and sanded it one final time before sealing it. I sealed it all with 2 coats of polyurethane with a light sanding in between each coat. The extra sanding will lighten the gray tone of weathered oak.


So this is it guys! My very first experience with woodworking and building a faux butcher block countertop and I think it was a success! This brings the laundry room makeover to completion and if I’ve missed out anything please leave me a comment below so I can answer any of your questions.

So this is it guys! My very first experience with woodworking and building a faux butcher block countertop and I think it was a success! This brings the laundry room makeover to completion and if I’ve missed out anything please leave me a comment below so I can answer any of your questions.
Products Used
- Ryobi Brad Nail Gun
- Ryobi Compound Miter Saw
- Black and Decker Orbital Sander
- Iron on Veneer Edging
- Brad Nails
- Minwax Stain in Weathered Oak
- Polyurethane
- Wood Glue
- Peel and Stick Tile
FAQs
What if I have a laminate countertop in my laundry room?
No problem! If you have a laminate countertop in your laundry room, you can actually put wood veneer boards on top of your existing counter tops and the end result will be like real butcher block. I saw this project on Tiktok – make your own following this tutorial.
Can I make this with another type of wood?
Yes! You can use any type of wood you like, I used pine because I needed this to be cost effective.
Laundry Room Update
If you’re a long time follower on my Instagram, you know this laundry room got another major upgrade a few years ago when I finally built another long countertop with better quality wood. You can read all about it here:

This post contains affiliate links to products that I used or recommend. If you purchase something through an affiliate link, I may receive a small percentage of the sale at no extra cost to you. I really appreciate your support!


4 comments
thank you for the tips.
finally, i upgraded my laundry room based on your info. thank you again
I’m so glad to hear that!!
Hi,
Love your finished look! I tried to recreate the look in my laundry room for the radiant pine plywood with 2 coats of weathered oak in minwax but it came out really gray. Did you use anything else on the wood to give it some warmth? It just looks alot different in the picture than mine.
Hi! that happened for me too! Once weathered oak dried off i sanded it down so the color got a lot lighter and I sealed it with polycrylic