Best Kitchen Cabinet Paint Finish for Professional Results
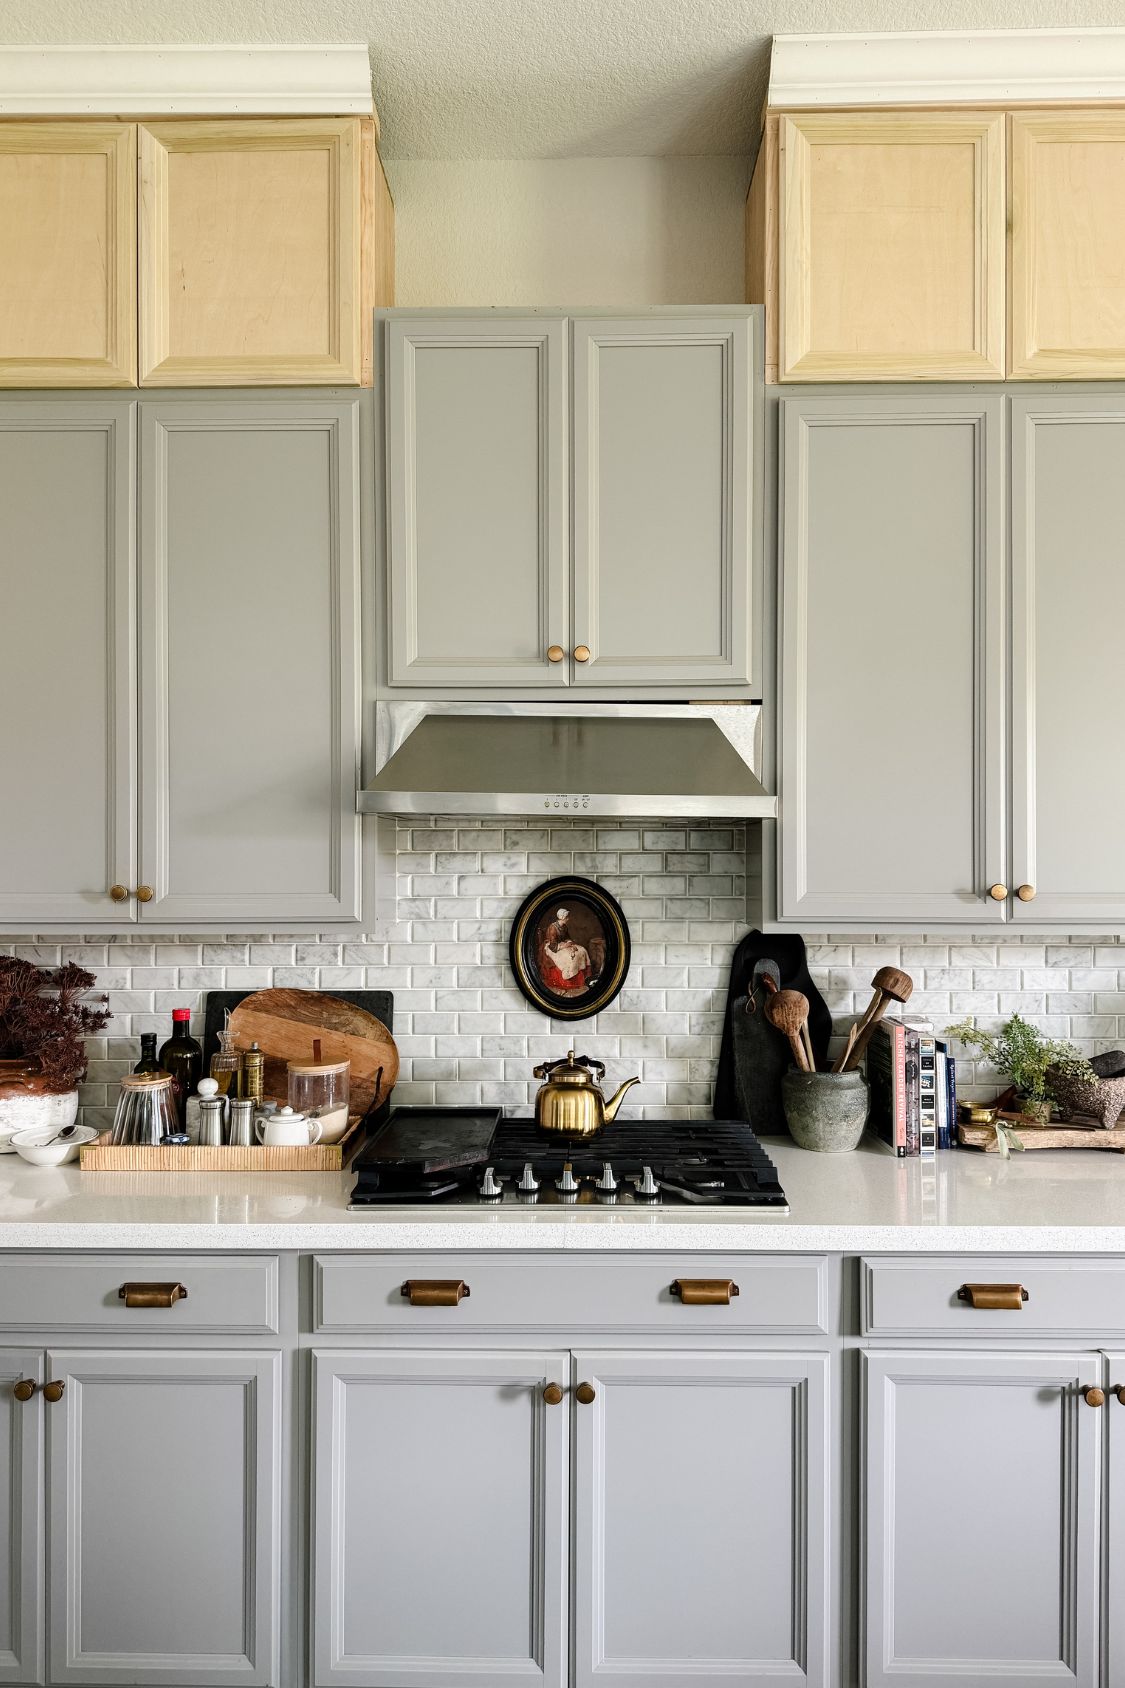
When it comes to giving your kitchen a fresh new look, painting your cabinets can make a world of difference. Recently, I did a budget friendly kitchen makeover and repainted the entire kitchen cabinets. This power of paint transformed the kitchen’s look and I got a professional finish that rivals any high-end renovation. Choosing the best paint, along with the right techniques, is crucial to getting the smooth, durable finish you want.
In this blog post, I’ll walk you through the process of selecting the best cabinet paint finish for professional results, whether you’re using oil-based paint, latex paint, or a hybrid paint. Whether this is your first time painting cabinets or you’re an experienced DIYer, these tips and techniques will help you achieve the best results. With the right tools and a bit of patience, you can transform your kitchen into a space that feels brand new. Transparently, I hired out this paint job for my kitchen but I have done many on my own and have observed and worked with professional painters to give you the best tips and research.
Before You Begin

Before diving into your kitchen cabinet painting project, it’s essential to spend time planning and prepping. A successful paint job begins long before the first coat of paint touches the wood surface, so trust me when I say this – don’t rush through this stage!
Assess Your Cabinets:
Start by thoroughly inspecting your cabinets. If they are made of raw wood or already painted, their current condition will influence the type of paint you should use. Consider whether your cabinets need minor repairs or extensive prep work, especially if you’re aiming for a smooth finish without any visible brush marks. So if you have stained wood cabinets, your prep work will be slightly different than if you had painted cabinets. Also figure out if the paint on your cabinets is oil based or water-based paint.
Gather Materials:
Make sure you have all the materials you need for a smooth process. High-quality paint is key—whether you choose Benjamin Moore’s Advance, Sherwin Williams Emerald, or another trusted brand. Consider the type of paint you’ll be using, such as oil-based paint, latex paint, or hybrid alkyd enamel paint. You’ll also need primers, brushes, foam rollers, painter’s tape, sandpaper, and drop cloths. If you’re working with a tight budget, you can still find excellent products at your local Home Depot. I don’t recommend getting cheap brushes or rollers – for a DIY-er your paint brushes have to be good quality to help with the finish.
Plan Your Time:
Painting kitchen cabinets is not a quick weekend project. Depending on the size of your kitchen and the condition of your cabinets, it could take several days or even a week to complete. Allocate enough time for each stage—prep work, priming, painting, and curing—to ensure the best results. Make plans for storing everything that’s currently in drawers because you will be taking them out to paint. I did not anticipate how much eating out we would be doing during this process! I would plan for meals in advance because everything including your fridge will be taped up if you choose to spray your paint.
Clean Your Workspace:
A clean, organized workspace is crucial. Remove items from countertops, cover appliances and floors with drop cloths, and ensure proper ventilation, especially when working with oil-based paints or paint sprayers. This will help you focus on achieving a smoother finish without interruptions. Make arrangements for kids and pets to be out of the workspace!
Oil Paint vs Latex

One of the most crucial decisions you’ll make when painting kitchen cabinets is choosing between oil-based paint and latex paint. Each type of paint has its pros and cons, and the best choice depends on your specific needs and the look you want to achieve.
Oil-Based Paint:
Oil-based paint, particularly alkyd paint, is known for its durability and ability to produce a smooth, brush stroke-free finish. It levels out nicely, which is why it’s often recommended for cabinets. Oil-based paint is also highly resistant to daily use, making it a good choice for high-traffic areas like kitchens. However, it has a longer dry time, a strong odor, and requires mineral spirits for cleanup. While oil-based primer provides excellent adhesion, it can be more challenging to work with compared to water-based options. Personally, I would leave this one to the professionals.
Latex Paint:
Latex paint, especially acrylic paint, has improved significantly in recent years. It offers the ease of use that makes it a popular choice for both professional painters and DIYers. Latex paint dries faster than oil paint, has a lower odor, and is easier to clean up. High-quality latex paints, like Benjamin Moore Advance paint, can achieve a durable finish comparable to that of oil-based paints. However, latex paints may require additional sanding between coats to ensure a smooth surface.
Hybrid Paint:
If you’re looking for the best of both worlds, consider hybrid alkyd enamel paint or waterborne alkyd paint. These paints combine the durability of oil-based paints with the easy cleanup of latex paints. They’re a great option for painting cabinets if you want a durable, smooth finish with less hassle.
Recommendation:
For most DIY kitchen cabinet painting projects, latex paint or hybrid paint is the best choice due to their ease of use and quick drying time. Oil-based paint is ideal if you prioritize durability and don’t mind the longer dry time and challenging cleanup. For the smoothest finish, especially on upper cabinets or a bathroom vanity, hybrid paints are a great option.
What Paint Finish to Choose

After choosing the best paint type, the next decision is selecting the right paint finish. The paint sheen you choose will significantly impact the final look of your cabinets, their durability, and how they stand up to daily use.
Matte Paint:
Matte or flat paint finishes offer a non-reflective surface that hides imperfections but are generally not recommended for kitchen cabinets due to their lack of durability and difficulty to clean. It’s usually not the best choice for high-traffic areas and will make the even the right color look dull with the flat finish.
Satin/Eggshell Paint:
Satin finishes provide a soft, subtle sheen that works well in kitchens. They offer a smoother finish than matte paint and are more durable, making them a good choice for cabinets. Satin finishes are popular because they balance a smooth appearance with ease of cleaning, without the high gloss that may highlight imperfections. Some paint manufacturers call Satin and Eggshell the same finish while others might have a slight difference between the sheens.
Semi-Gloss Paint:
Semi-gloss paint is perhaps the most popular choice for kitchen cabinets. It offers a noticeable shine, which reflects light and makes your kitchen feel brighter and more open. Semi-gloss finishes are durable, easy to clean, and resistant to moisture, making them ideal for kitchen environments. Semi-gloss paint highlights details like cabinet doors’ trim and paneling, making them stand out beautifully.
High Gloss Paint:
High-gloss paint provides a very shiny, reflective surface. It’s the most durable finish, easy to clean, and perfect for modern kitchens where a sleek, polished look is the goal. However, high gloss can highlight imperfections, so your prep work needs to be flawless to achieve the best results. From my experience, it’s the most difficult paint finish to get right so be warned!
Recommendation:
For most kitchens, a semi-gloss finish is the best choice. It strikes the perfect balance between durability, ease of cleaning, and aesthetic appeal. Satin finishes are also a good choice if you prefer less shine, while gloss finishes are great for a more modern, high-impact look. If you’re on a tight budget or working on a lower-traffic area like a bathroom vanity, satin paint is a great option.
Prep Work

Proper prep work is the foundation of a successful paint job. No matter how good your paint is, without thorough preparation, you won’t achieve the professional finish you’re after.
Cleaning:
Begin by cleaning your cabinets thoroughly. Kitchens are notorious for grease and grime buildup, especially on cabinet doors near the stove. Use a strong degreaser to remove all traces of oil, as these can prevent paint from adhering properly.
Removing Hardware:
Next, remove all cabinet hardware, including handles, knobs, and hinges. This makes painting easier and prevents you from accidentally getting paint on these parts. Label each door and its corresponding hardware to simplify reassembly later. Use painters tape to mark each cabinet box on the inside and write the corresponding number on the hinge.
Sanding:
Sanding is crucial for achieving a smooth surface. Whether your cabinets are made of raw wood or already have a finish, sanding helps create a rough surface for the primer to adhere to. Use 120-grit sandpaper for initial sanding, and after applying the first coat of paint, use finer grit sandpaper (220-grit) for a smoother finish. This will help reduce brush strokes and give you that professional look. After each time you sand, wipe down the cabinets to remove all sanding dust.
Filling Imperfections:
If your cabinets have any dents, scratches, or holes, use wood filler to smooth them out. Sand the filler smooth once it’s dry. This step is essential for achieving a flawless finish, especially if you’re aiming for a higher gloss paint look, where even minor imperfections can be highly visible.
Priming Before Painting

Priming is a non-negotiable step in painting kitchen cabinets. It ensures that the paint adheres well to the wood surface, covers any existing stains or colors, and helps achieve a more durable finish. Don’t fall into the paint + primer gimmick sold by paint companies. While it works for smaller surfaces I don’t recommend it for an entire kitchen or a high traffic area.
Choosing the Right Primer:
For kitchen cabinets, an oil-based primer or a high-quality bonding primer is usually the best choice. Oil-based primers offer excellent adhesion, especially on surfaces that have been previously painted with oil paint. If you’re using latex or hybrid paint, water-based primers are also a good option, as they dry quickly and are easier to clean up.
Applying the Primer:
Apply the primer in thin, even coats using a foam roller or paint sprayer for the best results. Let the primer dry completely according to the manufacturer’s instructions before sanding lightly and applying the first coat of paint.
Spray or Roll

Choosing between spraying and rolling your paint is another critical decision. Each method has its advantages, and the best choice depends on your skill level, equipment, and desired finish.
Spray Painting:
Using a paint sprayer can give you the smoothest, most professional-looking finish. Sprayers apply paint evenly and without brush strokes, making them ideal for a high-gloss or semi-gloss finish. However, they require more prep work, including masking off areas to avoid overspray, and they work best in well-ventilated spaces. If you’re aiming for the best finish and have access to a paint sprayer, this is often the best choice. It will require you to wear a respirator and seal off the entire kitchen with plastic sheets.
Rolling and Brushing:
If you don’t have a paint sprayer, using a high-quality foam roller and brush can still yield great results. Foam rollers are excellent for reducing brush marks, and brushes are necessary for cutting in around edges and corners. This method might require a bit more elbow grease, but it’s easier for beginners and doesn’t require as much setup as spraying. With a steady hand you can get great results with rolling.
 |
 |
 |
Sanding Between Coats

Sanding between coats is a step that many beginners overlook, but it’s essential for achieving a professional finish. This process helps smooth out any imperfections from the previous coat and prepares the surface for the next layer of paint.
Why Sanding is Important:
After applying your first coat of paint, tiny imperfections like dust particles or brush marks may appear. Lightly sanding the surface with fine-grit sandpaper (220-grit) helps to remove these imperfections and promotes better adhesion for subsequent coats.
How to Sand:
Use a light touch when sanding between coats. You’re not trying to remove the paint, just smooth the surface. After sanding, wipe down the surface with a tack cloth to remove any dust before applying the next coat.
Fixing Mistakes and Curing

Even with the best planning, mistakes can happen. Knowing how to fix them and understanding the importance of curing time can make the difference between a good paint job and a great one.
Fixing Common Mistakes:
If you notice drips, uneven coverage, or brush marks after a coat has dried, don’t panic. Lightly sand the affected area with fine-grit sandpaper until smooth, then reapply paint. For larger issues, such as a color mismatch or significant imperfections, you might need to sand down the area and apply a fresh coat of paint. For bigger drips that you notice after the paint is dry use a sharp blade to cut it out then repaint the patch.
The Importance of Curing:
Once the final coat of paint is applied, it’s important to allow sufficient curing time. While paint may feel dry to the touch after a few hours, it can take several days to fully cure and reach its maximum durability. Avoid heavy use of your cabinets during this period to prevent damage. Proper curing ensures that your fresh coat of paint achieves the durable finish you’re aiming for.
Repainting your kitchen cabinets is a powerful way to transform your entire kitchen, and with the right approach, you can achieve professional results without hiring a professional painter. By selecting the best product and paint finish, thoroughly prepping the surfaces, and taking your time with each step, you’ll enjoy the satisfaction of a job well done.
Whether you’re a first-time DIYer or have tackled similar projects before, following these guidelines will help you achieve the finish that’s perfect for your kitchen. With the best kitchen cabinet paint brand and the right techniques, your kitchen will look fresh and updated for years to come. I can’t wait to reveal my full kitchen makeover soon but the color I chose is Natural Tan by Sherwin Williams.
Kitchen Design Inspiration and Ideas
Now that you know what you’re getting yourself into when painting your kitchen cabinets, here are some kitchen design ideas and trends you can check out.


3 comments
Fariha, they turned out so well! I am loving how comprehensive this whole post is, well done!
Great insights! I never considered the sheen levels in cabinet finishes before reading this. Your tips on prep work and choosing the right paint really make a difference. I can’t wait to apply this knowledge on my kitchen makeover! Thank you for sharing such valuable information!
This post was incredibly helpful! I had no idea that choosing the right finish could make such a difference in the overall look of my kitchen cabinets. I’m leaning toward an eggshell finish now after reading your insights. Thank you for sharing your expertise!